Your first burn needs four things: a pen that heats evenly, a smooth piece of light-coloured wood, a simple design, and about an hour where nobody rushes you. Wood burning for beginners is far more forgiving than it looks. If you can trace a line with a pencil, you can learn to burn one, and the skills build quickly once you understand how heat, speed and pressure work together.
This walkthrough takes you from an empty bench to a finished first piece. We cover what to buy, how to set up, how to warm up your hand, and the exact order to work in so your first project looks clean rather than blotchy. Each part links to a deeper article in the series when you want more detail.
What wood burning actually is
Wood burning, also called pyrography, means drawing on a natural surface with a heated metal tip. The heat scorches the surface fibres and turns them anywhere from pale tan to deep black. There is no ink or paint involved. Every tone you see on a finished piece comes from how hot the tip was, how long it stayed in one place and how much of the tip touched the wood.
That gives you three controls to learn: temperature, speed and contact. Slow movement at a moderate setting gives a darker line than fast movement at a high setting. A tip held flat burns a wider, softer mark than the same tip held on its edge. Once that clicks, most beginner problems start to make sense, because almost every mistake is one of those three controls being off.
The beginner wood burning kit you need
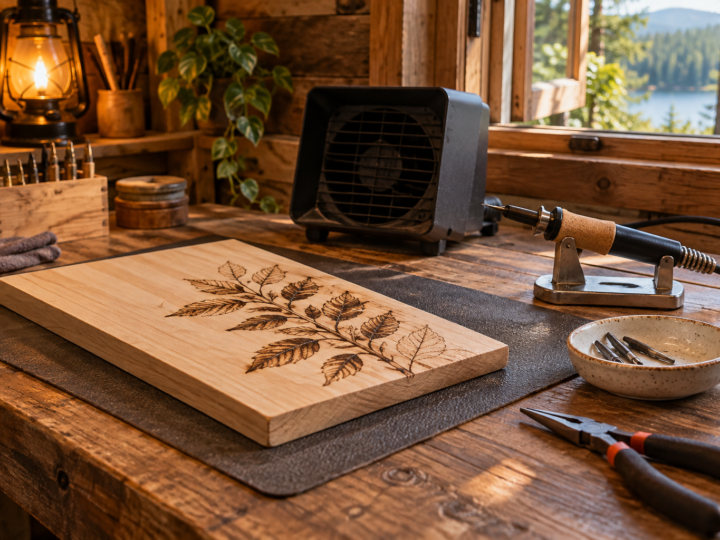
You can start small. A basic kit costs less than many art supplies, and you can upgrade later once you know what kind of work you enjoy. Here is what belongs on the bench for a first session:
- A wood burning pen. Either a solid point pen with screw-in tips or a wire nib burner with a separate control box. A pen with an adjustable temperature dial is far easier to learn on than a single-heat model.
- A pen stand. Most kits include one. Use it every time you put the pen down.
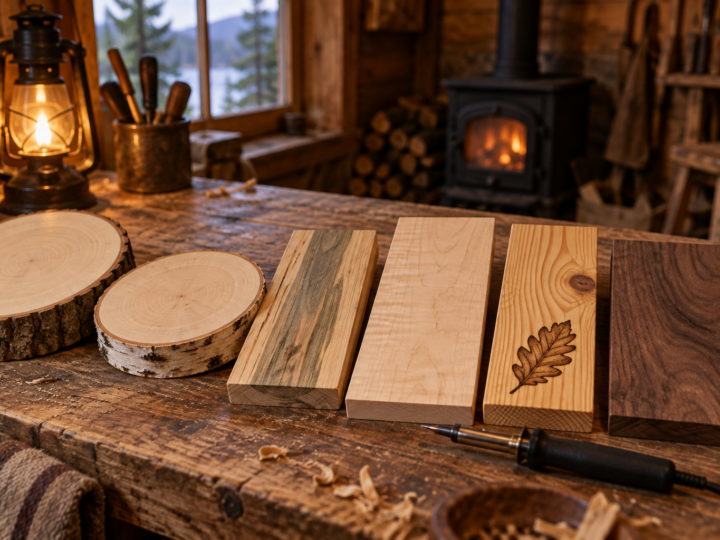
- Practice boards. Basswood, birch or poplar, sanded smooth. Offcuts are perfect.
- Sandpaper. 220 and 320 grit, plus a sanding block.
- Pencil and eraser. A soft HB or 2B pencil and a white plastic eraser.
- Needle nose pliers and a small ceramic dish. For changing hot tips safely and parking them while they cool.
- A small fan or fume extractor. Positioned to pull smoke away from your face.
The pen is the one item worth thinking about. Solid point pens are cheap and tough, while wire nib burners heat up in seconds and give finer control. We compare both in detail in choosing your first wood burning tool, including what each type does well and where it struggles.
Set up a safe, comfortable workspace
Pick a sturdy table near a window or door you can open. Smoke from burning wood is still smoke, so set a fan or extractor beside your work so it draws the plume sideways and away from you. Never lean directly over the tip and breathe in what rises from it.
Clear anything flammable from around the pen stand, including paper patterns, rags and loose cords. Put the stand on the side of your dominant hand so you never reach across a hot pen. If you have kids or pets, work where they cannot bump the table or pull the cord. Our full wood burning safety guide covers fumes, burns, electrical care and the materials you should never put under a hot tip.
Choose and prepare your first board
Light, close-grained wood is the easiest surface to learn on. Basswood is the classic choice because it is pale, soft and has very little visible grain, so your lines go where you put them. Birch and poplar are good alternatives, and maple works well once you are ready for a harder surface that holds fine detail.
Avoid pine for now. Its soft and hard growth rings burn at very different speeds, so the tip skips and sinks as it crosses them. Also skip plywood, MDF and anything treated, painted or varnished. Plywood is not recommended because its glue layers give off harmful fumes and burn unevenly, and coated or engineered boards are worse. Our article on the best wood for wood burning goes species by species.
Sand the surface with the grain, first with 220 grit and then with 320. A smooth surface lets the tip glide, which gives you even lines instead of jittery ones. Wipe the dust off with a dry cloth before you draw anything. Raw wood with no finish at all is what you want.
How to wood burn: practice strokes before the real thing
Spend your first twenty minutes on a scrap board. This is the single habit that separates tidy first projects from frustrating ones. You are teaching your hand how this particular pen behaves at different settings, and no amount of reading replaces that.
Find your temperature
Dials vary between brands, so think in ranges rather than exact numbers. On a pen with a dial from 1 to 10, start around 4 to 5 for a solid point pen. On a wire nib burner, start low, around 3 to 4, because wire nibs heat fast and run hot. Let the pen warm up fully, usually a few minutes for a solid point pen and a few seconds for a wire nib, then pull a short line. If the line is pale and the tip drags, turn it up a notch. If it smokes heavily and leaves a dark halo around the line, turn it down.
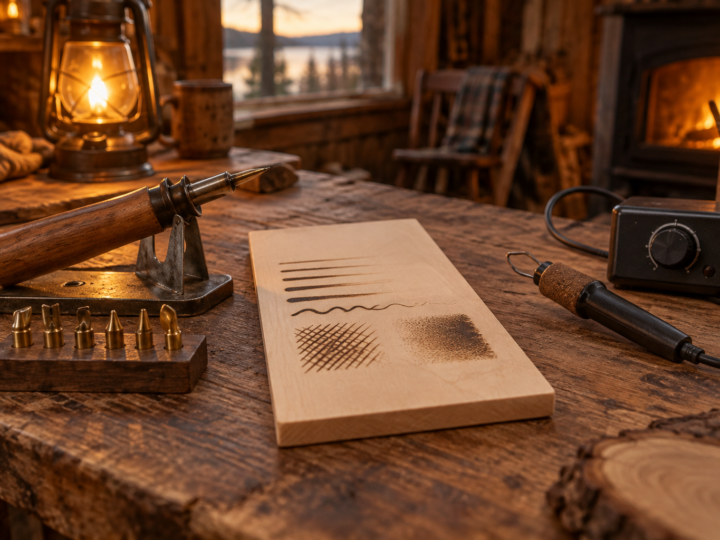
Practise these five marks
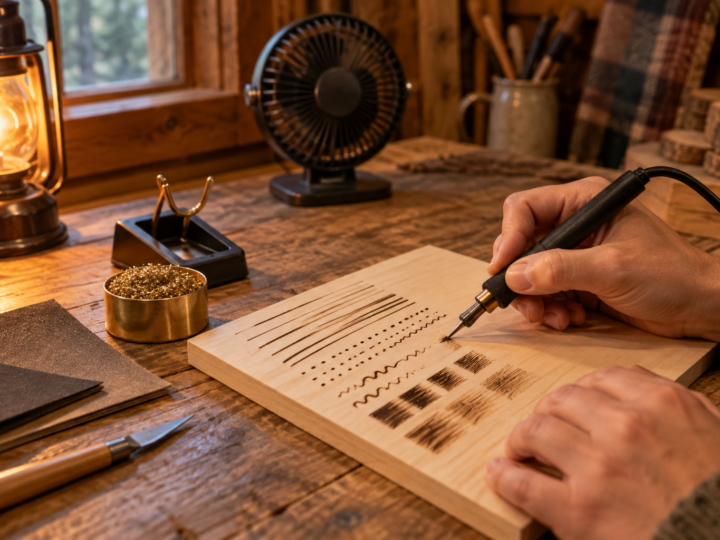
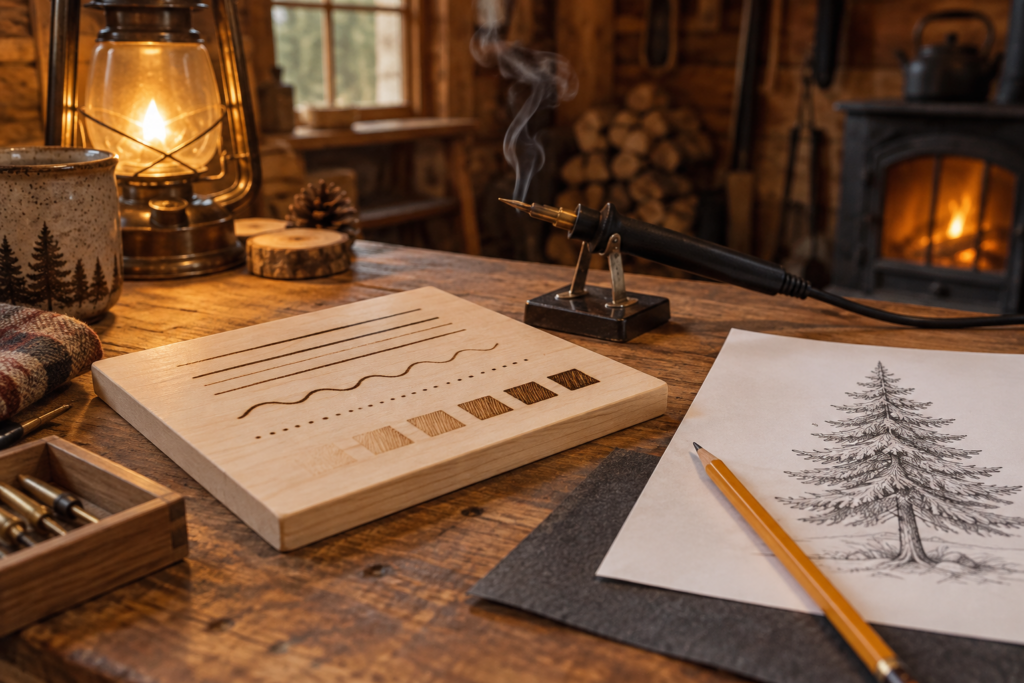
- Straight lines at three speeds. Burn one slow, one medium and one fast line with the same setting. Note how the colour changes.
- Gentle curves. Burn S-curves and circles, turning the board rather than your wrist.
- Dots. Touch and lift. Short touches give small light dots, longer touches give darker, larger ones.
- A tonal strip. Fill a small rectangle with tiny overlapping circles, light at one end and darker at the other.
- Line endings. Practise starting and finishing lines while your hand is already moving, so you do not leave a dark blob where the tip landed.
That last point fixes the most common beginner flaw. When the tip touches down and pauses, it burns a dark spot. Start your hand moving just above the wood, lower it into the stroke, and lift off while still moving, like an aeroplane landing and taking off. Within ten or so lines you will feel the difference.
Let the heat do the work. Pressing hard does not make lines darker in a useful way. It gouges the wood, bends wire nibs and makes lines uneven. A light grip, about as firm as holding a pencil for shading, gives better results. If a line is too pale, slow down or raise the heat a little instead of pushing.
Your first burn, step by step
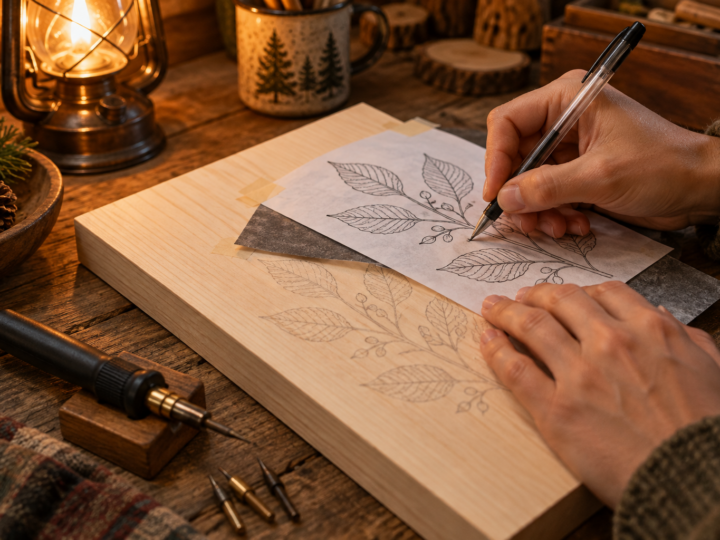
Pick a simple design with clear outlines and a little room for shading: a leaf, a mountain silhouette, a feather or a basic geometric shape. The free printable patterns on our pattern library are good practice material because they are sized for small boards and already have clean lines.
- Transfer the design. Use graphite transfer paper, or rub pencil on the back of a printout and trace over the front. Keep lines light so they erase cleanly. Our guide on how to transfer a pattern to wood covers every method.
- Burn the outline first. Use a universal or writing tip at a medium setting. Go over long lines in shorter sections of 2 to 3 cm, joining each section smoothly.
- Clean the tip often. Carbon builds up and causes uneven burning. Wipe the tip gently on a brass wool pad or a fine abrasive strip every few minutes.
- Add light shading. Switch to a shading tip or hold the universal tip flatter. Build tone in layers at a lower setting rather than trying to get dark in one pass.
- Darken selectively. Go back to the areas that should be deepest, such as shadows under a leaf edge, and add another layer or two.
- Erase and inspect. Once the board has cooled, erase leftover pencil. Look at it from arm’s length and touch up any gaps.
Layering is the core skill here. Light passes that overlap give smooth, even tone. A single slow, hot pass usually gives a patchy brown with dark edges. If you want to go further, our wood burning shading techniques article explains how to take flat tone to real depth.
Change tips only when the pen is switched off and cool, or use pliers if your pen is designed for hot swaps, and drop the removed tip into a ceramic dish. Never touch any metal part of a pen that has been on in the last few minutes.
Common beginner wood burning mistakes and quick fixes
Dark blobs at the start of lines. You are pausing as the tip lands. Move first, then lower the tip into the wood. Light blobs can be softened later by sanding gently with 320 grit folded to a sharp edge.
Wobbly lines. Usually speed or support. Rest the side of your hand on the board, or on a scrap of paper laid over finished areas, and move a little faster. Turn the board so you always pull lines towards you.
Patchy shading. Too hot or too slow. Lower the setting by one or two steps and work in small circular strokes that overlap.
Burning past the line. Small overshoots can be sanded back or turned into part of the design. For deeper mistakes, a craft knife held almost flat can shave away a thin layer. There is a longer list of fixes in our wood burning tips for beginners.
After the burn: finishing your first piece
Raw burned wood looks great, but it marks easily and fades slowly in strong light. Let the piece sit for a few hours, then brush away loose carbon with a soft dry brush. Avoid wiping it with a damp cloth, which can smear the soot into the pale areas around your lines.
For a simple first finish, a clear spray sealer in matte or satin is the easiest choice, applied in two or three light coats outdoors or in a well-ventilated room. Food-safe mineral oil suits spoons and cutting boards. Our article on how to finish and seal wood burning explains each option and how to add colour without muddying your lines.
Your learning path
The Learn Pyrography series runs in thirteen parts. Each one builds on the last, so working through them in order gives you a solid foundation before you take on textures, portraits and burning on other surfaces.
- Wood Burning Safety
- Wood Burning for Beginners: A Step-by-Step Guide to Your First Burn
- Choosing Your First Wood Burning Tool: Solid Point vs Wire Nib
- Best Wood for Wood Burning (and the Woods to Avoid)
- How to Transfer a Pattern onto Wood for Wood Burning
- Wood Burning Tips for Beginners: 25 Things Worth Knowing Before You Start
- Wood Burning Tips Explained: What Each Nib Does and When to Use It
- How to Wood Burn Letters That Look Clean and Even
- Wood Burning Shading Techniques: From Flat Tone to Real Depth
- Pyrography Textures: Stippling, Fur, Feathers and Wood Grain
- How to Finish, Seal and Color Wood Burning Art
- Wood Burning Portraits and Realistic Animals: An Advanced Guide
- Pyrography on Gourds and Leather: Burning Beyond Wood
Frequently asked questions
Is wood burning hard to learn?
The basics are easy to pick up in a single afternoon. Clean outlines and simple shading usually come together within your first few projects. Realistic work takes longer, but the skills are learned in small steps rather than one big leap.
What temperature should a beginner use for wood burning?
Start in the lower middle of your dial, around 4 to 5 out of 10 on a solid point pen and 3 to 4 on a wire nib burner. Test on scrap from the same board and adjust one step at a time. Slower strokes at a lower setting usually look better than fast strokes at high heat.
Can I use a soldering iron for pyrography?
You can make marks with one, but most soldering irons have bulky tips and limited temperature control, which makes fine lines and smooth shading difficult. A purpose-made wood burning pen with an adjustable dial is a much better learning tool and does not cost much more.
How long does a first wood burning project take?
A small design on a coaster-sized board typically takes one to two hours including practice strokes and transfer. Rushing is the main cause of patchy results, so plan for a relaxed session and take short breaks to rest your hand.
Continue the Learn Pyrography series
This is part 2 of 13. Previous: Wood Burning Safety. Next: Choosing Your First Wood Burning Tool: Solid Point vs Wire Nib.