Good shading in pyrography is built from many light layers, not one dark pass. The wood burning shading techniques that give real depth all rely on the same idea: control how much heat reaches each spot by adjusting temperature, speed and the number of passes. Learn to make five or six clearly different tones on purpose, and every pattern you burn starts to look rounder and more alive.
Below we cover value scales, layering, pull-away strokes, circles and scumbling, hatching, shader nibs, temperature versus dwell time, smooth gradients and how to avoid blotches. If you have not burned a line yet, read our beginner’s guide to wood burning first, then come back with a scrap board.
Start with a value scale
A value scale is a row of boxes that runs from the bare wood colour to the darkest tone you can burn. It is the single most useful practice piece in pyrography, because it teaches your hand what each tone feels like and gives you a reference card for every project afterwards.
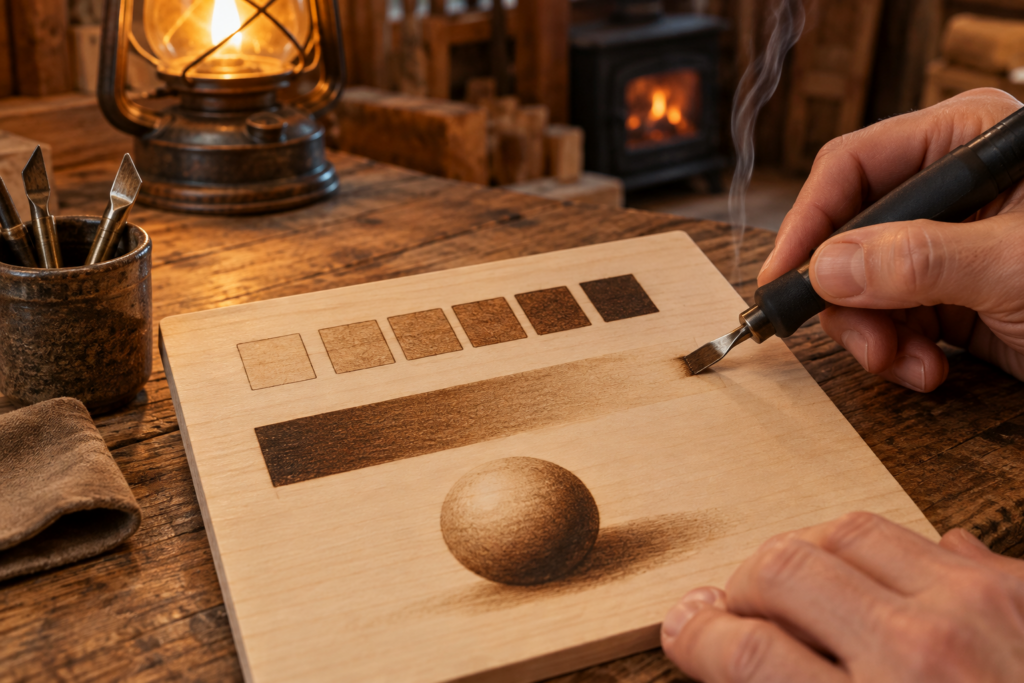
Draw a strip of six boxes, each about 2 cm square, on a piece of sanded basswood. Leave the first box bare. Burn the second box with one quick, light pass at a low setting. Build each following box a step darker, mainly by adding passes rather than turning the heat way up. The last box should be a deep, even chocolate brown, close to black but without a shiny, charred crust.
Make the scale on every type of wood you use. Basswood, birch, maple and poplar all take tone differently, and pine with its hard and soft rings is much harder to shade evenly. Our article on the best wood for wood burning explains why pale, fine grained woods give the smoothest gradients.
Temperature versus dwell time
Two things decide how dark a mark gets: how hot the nib is and how long it stays in contact with the wood. That contact time is called dwell time. High heat with a fast hand and low heat with a slow hand can give a similar tone, but they look very different up close.
High heat scorches the surface quickly and tends to leave harsh edges, shiny patches and a halo of yellow scorching around the mark. Low to medium heat with longer dwell time sinks colour into the fibres gradually, which gives softer, warmer tones with fewer surprises. For most shading, keep the heat lower than you would for outlines and let slow strokes and extra passes do the darkening.
As a rough guide on a dial of 1 to 10, light shading on basswood often sits around 3 to 5 and darker shading around 5 to 7. Wire nib machines usually need a lower number than solid point pens for the same result. Test on scrap every session, because room temperature, wood moisture and even a dirty nib change the outcome.
Keep the nib clean
Carbon builds up on the face of a shader quickly. A coated nib burns cooler and drags, so you slow down to compensate, and then the tone jumps when the carbon flakes off. Wipe the nib every few minutes on a brass brush or a fine abrasive pad. On wire nibs, a gentle rub with a strop or fine aluminium oxide paper keeps the face bright without wearing the wire too fast.
Shader nibs and how to hold them
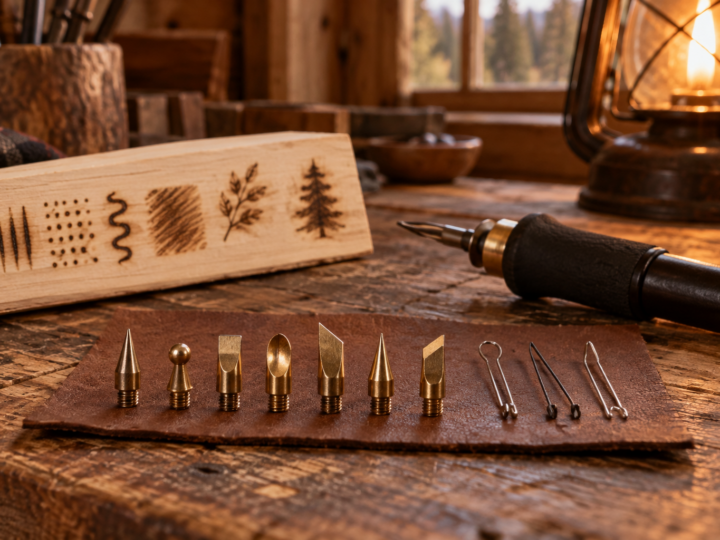
You can shade with almost any tip, but a flat shader makes broad, smooth tone far easier. Most budget solid point kits include a flat shading point shaped like a small paddle or a spoon. Wire nib systems offer spoon shaders, flat shaders, bent spear shaders and round heel shaders in several sizes.
Hold the shader so the flat face rests on the wood at a low angle, close to parallel with the surface. The flatter you hold it, the wider and softer the mark. Tilt it up onto its edge and it becomes a fine line tool, which is handy for shading tight corners. A spoon or round heel shader has a curved back that glides without digging in, so it is the friendliest choice for gradients. For more detail on each shape, see our guide to what each nib does and when to use it.
Whatever nib you use, keep pressure light. Pressing a shader hard does not make it darker in a controlled way. It dents the wood, which then catches more heat and goes blotchy.
Layering: how to shade with a wood burner
Layering is the habit that separates flat burns from rich ones. Instead of burning an area to its final tone straight away, you cover the whole area in a light tone, then go back and add another light layer only where it needs to be darker, and repeat.
- Map the light, middle and dark zones lightly in pencil, or keep a reference photo beside you.
- Burn one pale layer over everything except the brightest highlights.
- Add a second layer over the middle and dark zones, changing the direction of your strokes slightly.
- Add third and fourth layers only to the darkest zones.
- Step back, compare to your value scale, and adjust.
Layering gives you a chance to stop. You can always add another pass, but you cannot easily take tone away. It also blends small inconsistencies, because each new layer partly covers the marks of the one before.
Stroke types for pyrography shading
The way you move the nib changes the character of the tone. Practise each of these on your scrap board until you can make it look the same every time.
Pull-away strokes
A pull-away stroke starts dark and fades to nothing. Put the shader down in the darkest area, pull it toward the lighter area, and lift gradually as you go, like a plane taking off. The mark is darkest where the nib touched down because that spot had the most dwell time.
This is the go-to stroke for shading the edge of a petal, the underside of a leaf or the shadow side of a round shape. Lay many pull-away strokes side by side, each starting at the dark edge, and you get a soft gradient in a single layer. Keep the strokes short at first, around 1 to 2 cm, since long strokes are harder to fade evenly.
Circles and scumbling
Scumbling means moving the nib in small overlapping circles or loose scribbles, never stopping in one place. It produces a smooth, slightly textured tone with no visible stroke direction, which is ideal for skin, sky, smooth stone and backgrounds. A ball tip or a spoon shader works well.
Keep the circles small, around 2 to 4 mm, and overlap them heavily. Big loose loops leave visible rings. To darken an area, go over it again with more circles rather than slowing down, so the tone stays even.
Hatching and cross-hatching
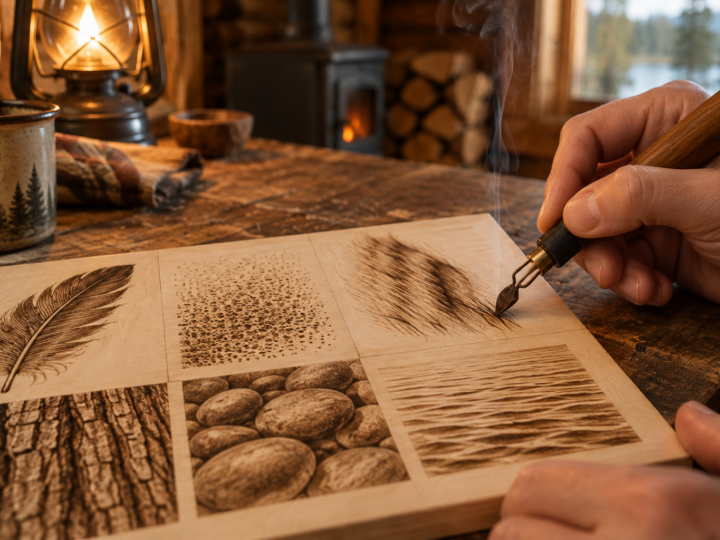
Hatching is a set of parallel lines. The closer the lines, the darker the area reads. Cross-hatching adds a second set of lines at an angle, usually 45 or 90 degrees to the first, and a third or fourth set for the darkest areas. A fine writing tip or a small skew does this best.
Hatching gives a graphic, engraved look that suits rustic signs, botanical illustrations and vintage style patterns. Keep the line spacing consistent within an area. Curving the hatch lines to follow the form of an object, such as around a pumpkin or a tree trunk, makes it look rounded without any extra tone.
Stippling, building tone from dots, is a fourth option. It deserves its own section, so we cover it with other surface effects in the next article on pyrography texture techniques.
Burning smooth gradients
A gradient is a gradual change from dark to light with no visible steps. It is the hardest shading skill to master and the one that makes work look most realistic. Try this exercise: draw a rectangle about 3 cm by 10 cm and aim to fade it from your darkest tone at one end to bare wood at the other.
Start with one light layer across the whole rectangle except the last centimetre. Add a second layer stopping about two thirds of the way along. Add a third layer stopping halfway, and a fourth over only the dark third. Then blend the boundaries between layers with light scumbling circles that cross the joins. Each boundary softens because the circles fade the edge into the next zone.
The light end is where most gradients fail. People tend to finish too dark, so the gradient stops abruptly instead of fading. Use your lowest useful heat and a quick hand for the final pale zone, and leave a strip of bare wood beyond it.
Wood burning shading tips for avoiding blotches
Blotches are dark spots that appear where you did not want them. They nearly always have one of a handful of causes, and each has a simple fix.
- Touching down on a still nib. Always start moving before the nib meets the wood, and keep moving as you lift off.
- A heat surge after a pause. A nib that has been held in the air for a while gets hotter than one in use. Touch it to a scrap first after any break.
- Grain changes. Soft spring growth burns faster than hard summer growth. Lower the heat and speed up slightly when crossing soft rings.
- Too much heat. If tone jumps from pale to dark with no middle, turn the dial down a notch and add passes instead.
- A dirty or pitted nib. Clean it and, on a solid point, polish out any rough spots with fine abrasive paper.
If a blotch happens anyway, you have options. A light blotch can often be blended by shading the area around it slightly darker so it reads as part of the gradient. A darker one can be lifted with a sharp craft knife held almost flat, scraping the scorched surface fibres, then smoothed with 320 grit sandpaper. Scraping is also the standard way to bring back highlights in dark areas, such as a catchlight in an eye or a glint on water.
Practice plan and putting it together
Shading improves fastest with short, focused sessions. Spend 15 to 20 minutes on a practice board before you start any project. Burn one value scale, one gradient rectangle and a small sphere: a 4 cm circle with a light source at the top left, shaded darker toward the bottom right, with a cast shadow underneath. The sphere teaches you to think about light direction, which is what makes shading look real.
Once you can shade a sphere convincingly, move to simple patterns such as leaves, mushrooms and feathers. The free printable patterns on our wood burning patterns blog make good practice material, because the outlines are done for you and you can concentrate on tone. Later, the same layering methods carry straight into realistic animal and portrait work.
Shading creates more smoke than line work, since you are burning larger areas. Work by an open window and use a small fan or fume extractor that pulls smoke away from your face.
Frequently asked questions
What is the best tip for shading in wood burning?
A flat or spoon shaped shader is the easiest for smooth tone over larger areas. A ball tip works well for scumbling small areas, and a fine writing tip or skew is best for hatching. Many burners use two or three shaders in different sizes.
Why is my wood burning shading patchy?
Patchy shading usually comes from heat set too high, inconsistent speed, or a dirty nib. Lower the heat, build tone with several light layers and clean the tip often. Uneven grain in woods such as pine also causes patches, so practise on basswood or birch.
Can you shade with a basic one temperature wood burner?
Yes, though it takes more control. Since you cannot lower the heat, you change tone through speed, pressure and the number of passes. Moving quickly and lifting the pen slightly gives light tones. Our guide to choosing your first wood burning tool explains why adjustable heat makes shading easier.
How do I fix a spot I shaded too dark?
Scrape it gently with a sharp craft knife held almost flat, then smooth the area with 320 grit sandpaper. Light scorching sits near the surface and lifts well. Very deep burns are harder, so it is often easier to darken the surroundings to blend it in.
Continue the Learn Pyrography series
This is part 9 of 13. Previous: How to Wood Burn Letters That Look Clean and Even. Next: Pyrography Textures: Stippling, Fur, Feathers and Wood Grain. New to the series? Start with Wood Burning Safety, then the beginner guide.